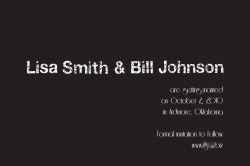
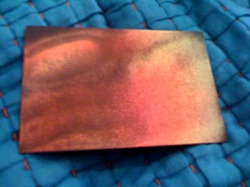
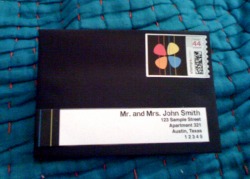
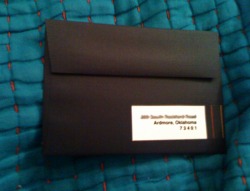
Save The Dates
Save the dates are done!!! I got silver lithography printing on a black 3.5 x 5 inch card (you can see my design below, but I changed our last names on it for privacy). Then, I spray painted the backs of all the cards w/ fluorescent pink, yellow, and orange (also pictured below, but the colors are terrible in the pic! It's much brighter and nicer looking in person, I promise!). I got black envelopes that fit the cards, and I designed wrap around labels that I used a Xyron to attach (my new favorite toy!). I also got custom stamps with our wedding logo I designed on them. Overall, I was hoping to capture the general feeling I'm attempting for the wedding (a balanced mix of elegant and fun 80's style).
Wedding Website
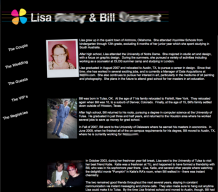
I couldn't find any basic template sites that I liked, so I'm building our website from scratch using flash, fireworks, and dreamweaver! It's almost done (which is good since it's listed on our save the dates that already went out!) The picture just shows one page (w/ last names blurred out of course), but that top bit is animated, so it's a little more visually interesting in person.
Invites
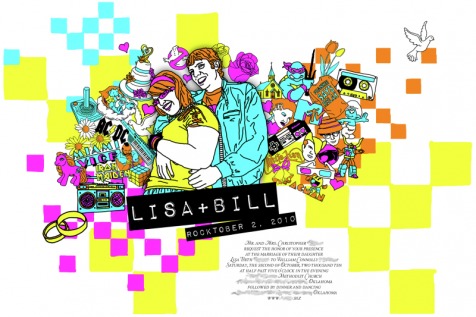
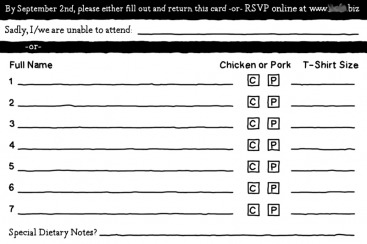
We got the invites printed! Silk screening didn't work out, so we just had them laser printed. But they came out awesome, in my opinion! They are 12"x18", to mimic a concert poster. We will send them out in poster tubes. The reply card will be a postcard, or guests will have the option to RSVP online. The main issue I ran into designing these was the need to know which guests would have which dish and their t-shirt size (and also to get the full names of all plus ones, etc, that we don't already know). I think the solution I came to is pretty effective!
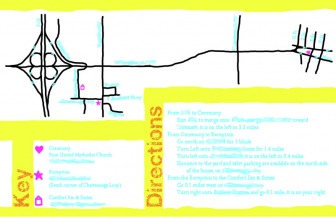
Directions Insert:
Above: Front of reply postcard
Below: Back of reply postcard
Below: Back of reply postcard
Favors
We are doing t-shirts for our favors. Update: We have decided to only have something on the front of the shirt, due to budget restraints. So here is the updated front-only design!
Escort & Place Cards
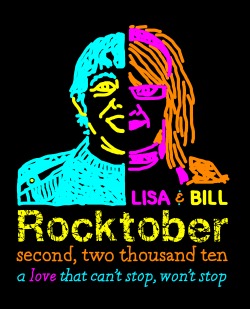
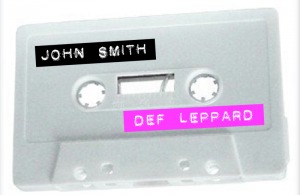
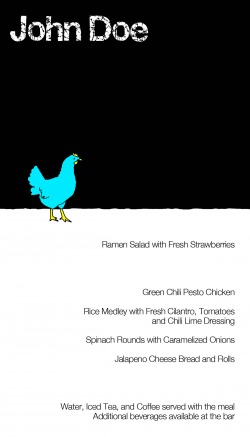
When guests come in, each of them will have a cassette (which we are recording a mix onto) with their name and table name (each table will be named for an 80s band). Then, at their seat at the table there will be a place card and menu propped up in the case for their cassette. Here is what the cassette escort cards look like (we have blank white cassettes and we are using label maker labels in our colors to label them) and the designs I have made for the place cards/menus (guests have a choice of chicken or pork, so their card will match their selection), and for the j cards for the cassette cases.


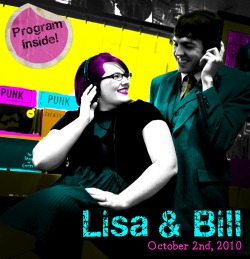
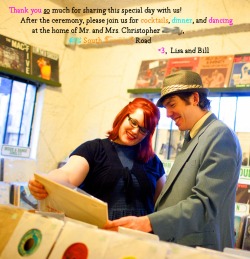
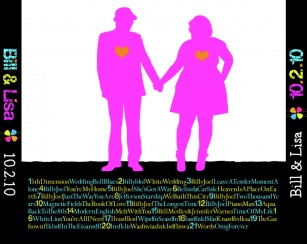
Programs
I have been working lately on designing my programs, which will be in the form of mix cds! This are still totally IN PROGRESS, so don't judge yet!!! But, I wanted to go ahead and post what I've done, because I think I have the basic idea of the design worked out. Of course, I can't finalize the text or anything until I have the ceremony all planned. So anyway, here's where I'm at!
The front cover of the cd booklet/program.
The back cover of the booklet.
The image that will be on the cd itself

The spread inside of the cd booklet/program, where all of the info is.

The back of the cd case, where the playlist of the cd will be listed. (And the sides that fold up)
The image you will see when you remove the cd from the case, behind the clear tray.

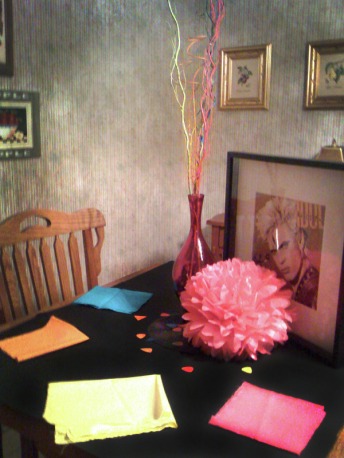
Centerpieces
I recently got to make a mock up of what the centerpieces will look like! Each table will have a framed album cover (for the artist/band the table is named for), and the record itself will be a base for a vase (either clear or in one of our wedding colors - all of our vases are different) with sticks in all of our colors, a tissue paper pom in one of our colors, a tea light, and guitar picks in our colors sprinkled around.
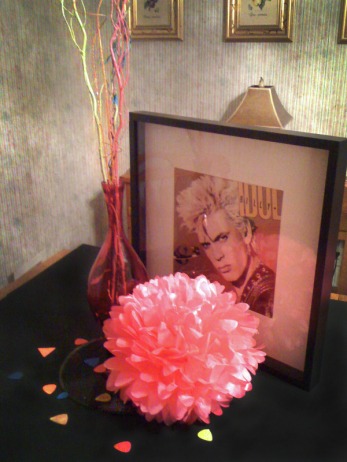
My mom is making us napkins in our colors too!!!
